Encoded depth
You can set/adjust Origin's cut depth in cutting mode by clicking on the depth setting in the left sidebar menu:
Origin’s cut depth menu allows you to set/adjust the tool cut depth and the selected paths encoded depth.

1. Tool Cut Depth: The depth that Origin will cut to when you click the green button
2. Cut Depth Calculator: Sets/adjusts the tool cut depth
3. Encoded Depth Settings: Assign depths to individual paths in your Workspace to keep track of your cut plan and avoid accidentally cutting too deep.

4. Status Message: Explains how the tool cut depth and encoded depth relate based on your current settings.
5. Encoded Depth Button: Displays the status of the encoded depth. Click the button to set/edit the encoded depth for the selected path.
6. Delete Button: remove the encoded depth from the selected path.
7. The Transfer Button: allows you to copy the selected paths Encoded Depth to the Tool Cut Depth with a single click.
8. Info Button: Opens a quick guide which provides a bitesize summary of Encoded Depth right on the tool.
To use Encoded Depth, go to Cut Mode and move Origin over any path in your Workspace to select it. The path will be highlighted in green and the cut path preview will appear when it is selected:
| (1) | (2) |
 |
 |
Click the Depth setting in Origin’s left sidebar. The Encoded Depth settings are shown to the right of the calculator. To add a new Encoded Depth to the selected path, click the Encoded Depth Button and use the calculator to input a new depth. Click done to assign the depth to the selected path.
| (1) | (2) |
 |
 |
| (3) | (4) |
 |
 |
Note that the tools cut depth and each path’s encoded depth are controlled separately. If you want to cut to the encoded depth, you’ll need to manually change the tool’s cut depth using the calculator. In many situations, it won’t be possible for you to cut to the path’s encoded depth in a single pass. You may need to complete multiple passes in order to reach the encoded depth safely.
If the selected path has an Encoded Depth assigned to it, it will be displayed as a label directly above the cut reticle in the center of the screen. Clicking this label will open the Cut Depth menu.
If some paths in your Workspace are assigned with Encoded Depths and some are not, those which are not will display an “unset” label when you select them.
 |
 |
| A path with an Encoded Depth | A path without an Encoded Depth |
If the tool cut depth and selected paths encoded depth are equal, a green check mark will be displayed to let you know that you are at the target depth for the path. The Encoded Depth Settings will display the encoded depth for the selected path with a green highlight.
| (1) | (2) |
 |
 |
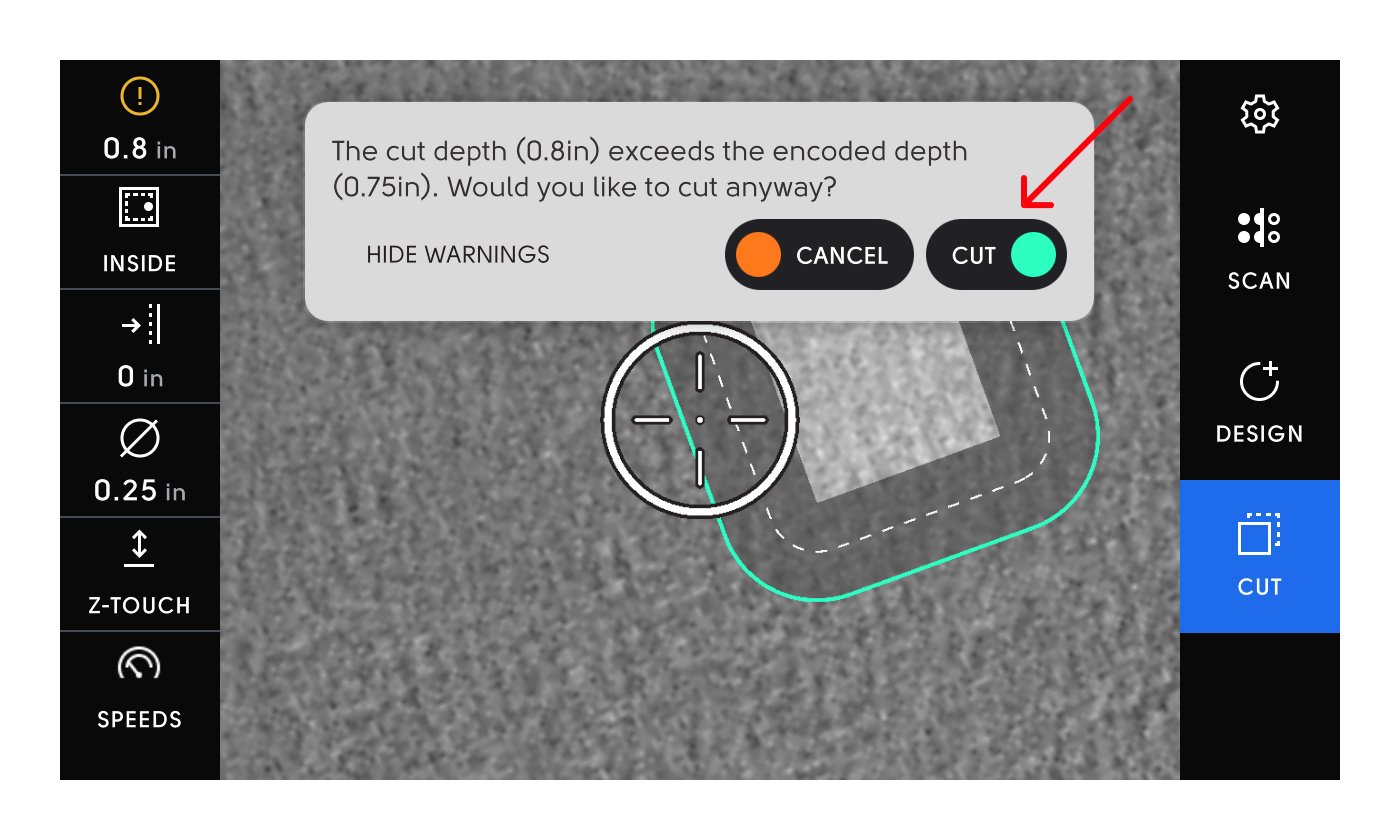
If the tool cut depth exceeds the selected paths encoded depth, a warning will be displayed to prevent you from cutting deeper than you intend.
| (1) | (2) |
 |
 |
If you attempt to cut while the over depth warning is displayed, a modal will appear to warn you that you are about to cut deeper than the paths encoded depth. You can bypass these warnings by clicking the cut button a second time.

To avoid these warnings repeatedly appearing, adjust or remove the paths encoded depth. Alternatively, click “hide warnings” in the modal. Choosing to hide warnings will stop Origin from warning you when you click the green cut button. You’ll still see the passive warnings in the left sidebar.
| (1) | (2) |
 |
 |